
Be A Savvy Traveler

5 Things You Didn’t Know About Make-up Remover Pouches

Makeup remover wipes are really nothing new as far as cleaning your face or removing stubborn makeup goes. What is different however is, what’s in and on the wipes that you use. Most women that have skin sensitivity prefer Vegan or Hypoallergenic wipes that tend to eliminated addition irritants that can make skin issues worse.

I can scarcely remember the last time I was at a checkout counter where I couldn’t buy a pouch of cleansing wipes.  Last night I ran a last-minute errand at Dollar General to pick up school supplies for a specific class my son is taking.  As I scan the rack filled with an impulse buy items that would neatly tuck in my purse or my son’s backpack, I noticed a 20 count pouch of makeup remover wipes. I’ll admit 20 wipes for $1 was pretty tempting. What kept me for spending a dollar on something I could readily use at almost anytime? I remembered the following 5 things that most people didn’t know about makeup remover pouch wipes.

1. CROSS CONTAMINATION

Opening and removing a single wipe from a top close or peel pack pouch can cross contaminate the entire pouch of wipes. Moreover, if you are removing makeup or dirt from your face or body and use a second wipe to “get all the dirt” you actually introduce microorganisms to the entire pouch. which can further irritate your skin or cause breakouts. Carrying pouches in your handbag with other items can further introduce bacteria into the pouch that does deal properly seal.

2. MOSTLY WATER

Most wipes, no matter what the brand is, contains about 98% water. The remaining 2% is what you should be aware of and what ingredients are included. This is what will make the difference in what is working and what is not. Luxury Beauty wipes tend to cost more because the ratio to water and active ingredient tends to be higher and more effective because they’re usually designed for the specific purpose of cleaning makeup or oil-based mascaras which tend to contain ingredients that water just can remover very well.

3. DRIES OUT QUICKLY

Just like that pack of cheese you shredded to put on your tacos, not to mention those tasty margaritas you had last Saturday night, opening and closing the package will allow air to get in and dry out much faster than a single packed wipe would. In the end, saving money on something you’ll buy more often isn’t really saving. More air in a pouch over time makes the wipes nearly bone dry and they won’t achieve the result you originally intended when the impulse to buy them in the first place overtook you at checkout.

4. BABY WIPES ARE NOT MEANT FOR YOUR FACE

I admit that I’ve been guilty of using baby wipes to clean my face or remove makeup. While they are gentle on your baby’s bottom, they are designed to clean urine and feces from your child’s skin. Think about that for a minute. A product designed to clean human waste will include ingredients and chemicals strong enough to reduce blossoming organicism and bacteria that can be introduced to the skin. Yes, there are organic and vegan baby wipes, but they tend to cost more because they do not contain these more aggressive chemicals ( just ask Jessica Alba). No, I don’t want to clean my face with poop cleanser thank you very much. Stick to products that are designed for the purpose you intend to use them for.

5. MADE IN CHINA

Nearly everything is made in China. There is nearly no way around it. There are a handful of US manufacturers that still produce wipe products. The FDA strongly regulates what ingredients and claims can be made of products that go on or in our bodies. While bulk buying is virtually a standard for the US. Convenience and the desire to get more for your money is prevalent in our culture, you get what you pay for. Regulations and quality not as important to you as saving a buck or two? Then bulk pouches are for you. Single pack wipes, while a bit more pricey when made in the USA but offers more convenience and sanitization.

10 Multitasking Beauty Products Perfect for Travel

Multitasking beauty products are absolutely essential when traveling. The heaviest items in my luggage are often toiletries and I need the same products whether it’s a weekend or two months away! The restrictions on baggage for international flights are so strict now. It’s important to find the balance between having all the necessities without paying for excess luggage.  Later this year we will be taking a family vacation to Europe and…

Multitasking beauty products are absolutely essential when traveling. The heaviest items in my luggage are often toiletries and I need the same products whether it’s a weekend or two months away!

The restrictions on baggage for international flights are so strict now. It’s important to find the balance between having all the necessities without paying for excess luggage.

Later this year we will be taking a family vacation to Europe and we will have to pack very wisely. I have two young children who can’t help us carry our suitcases and a husband who insists we take his road bike so he can cycle a stretch of the Tour de France!

I am always on the lookout for products that can be used in different ways and are safe for my family’s skin and health.

10 of My Favorite Multitasking Beauty Products

1. Clear Mascara

A clear mascara is great to define my lashes during the day and one of the best things is I don’t get panda eyes if I go swimming or to the beach! I also have quite strong brows, so a slick of clear mascara helps to define and tame them.

2. Tinted Moisturizer or CC/BB Cream with SPF

This has got to be at the top of my go-to multitasking beauty products. It is a foundation, moisturizer and sunscreen all in one. This is such a simple way of making sure my skin is hydrated but more importantly protected from the sun’s harsh rays. Melanoma (skin cancer) is one of most commonly diagnosed cancers in the United States. According to the American Cancer Society an estimated 87,000 cases of melanoma will be diagnosed in 2017 and 10,000 cases will be fatal. Those are really frightening statistics.

Sun damage is also a huge factor in skin aging.

3. Lip and Cheek Stain

Beauty and the Beast actress Emma Watson wears one everyday to add some warmth to her pale complexion. I don’t have her flawless skin, but a peachy pink color will keep my lips looking pretty and my cheeks fresh with a rosy hue all day.

4. Lip Balm with SPF

I always keep some lip balm handy to reapply during the day. It’s so easy to overlook your lips when applying sunscreen. In fact it is a really common place for skin cancers to form, particularly in men.

5. Neutral Eyeshadow Palette

An eyeshadow palette in a mix of matte and shimmer neutral colors will see you through any occasion. Celebrity makeup artist Nicole Bryl  uses one to make up eyes, fill in brows and contour cheeks.

You can use a dampened angle brush for a soft eyeliner and a light shimmery shadow is the perfect highlighter.

6. Shampoo or Body and Hair Wash

I use a gentle shampoo or all-over body wash to cleanse saltwater or chlorine from my hair after a day on the beach or by the pool. Chlorine actually chemically bonds to hair and skin which will dehydrate and damage it, so it is important to make sure to wash all traces of it and its strong smell away.

I also use shampoo to clean my makeup brushes and to hand wash clothes.

Multitasking beauty products are not just for me in the bathroom. An all-in-one body wash and shampoo is also really handy to use with my kids. I wash their hair and use the suds to clean their bodies. My husband takes one to the hotel gym to use in the shower after his workout.

Even though most hotels provide toiletries, they tend to contain really harsh ingredients so I always prefer to bring my own.

7. Conditioner

My hair is super thick and is prone to frizziness. I always use a conditioner after shampooing for smooth and shiny hair.

I also use it in place of shaving cream for legs and underarms. The razor glides over the skin meaning no nicks or cuts. If I do accidentally draw some blood, I can use a bit of lip balm to help seal the cut.

8. Face and Body Moisturizer

My skin really needs a moisture boost after a lot of sun exposure. A gel moisturizer works well as a soothing treatment for minor sunburn.

For a simple face and body scrub, try adding a small amount of sugar, salt or coffee grounds to some lotion.

9. Deodorant Stick

Particularly in summer, deodorant is a must-have. I always make sure to choose one that doesn’t contain parabens or pore-blocking aluminum.

A deodorant stick can also help stop shoes rubbing my feet.  If I feel my shoes becoming a little uncomfortable I can swipe on a little deodorant onto my skin to reduce the friction and avoid a nasty blister. It can work the same way to avoid chafing on thighs and other areas prone to irritation from sweat and rubbing on fabric.

A little deodorant on an insect bite is also a great way to ease the itching.

10. Travel Wipes

It is so important to look after your skin and take care of basic hygiene en route. I always make sure to pack some multi-purpose travel wipes in my carry-on bags.

Savvy Traveler makes a great Jet Set Kit with a variety of single-use wipes. This means I don’t have to pack small bottles and containers to pass through the strict security checkpoints.

I’d love to know, what are your favorite multitasking beauty products and what are the different ways you use them? Leave a comment below and share with the Savvy community!

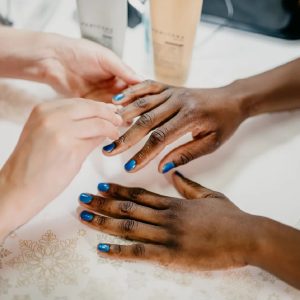
How to Apply and Remove Glitter Nail Polish Like a Pro

According to the Centers for Disease Control, a whopping 97 percent of nail salon foot baths tested in one study contained the bacteria M. fortuitum, an icky bug that can cause scarring boils on the skin. Fungal infections are another potential problem. – Lisa Mulcahy, Fox News

Glitter nail polish is no longer the domain of little girls playing dress up. Celebrities such as Blake Lively, Madonna and Katy Perry have all been snapped wearing blinged-up nails.

Glitter nail polish is notoriously difficult to get off, but with the right products and techniques it doesn’t have to be a time-consuming chore.

Keep reading for some tips on how to first properly apply and then remove glitter nail polish without ruining your nails.

It’s All in the Application

Have you ever applied glitter nail polish the same way as you do regular colored polish and realized that it looks patchy? If you want the glitter nail polish to look as good on your nails as it does in the bottle, then check out beauty vlogger Kelli Marissa. In her video she demonstrated how easy it is to apply glitter nail polish.

Normally, you would have to layer multiple coats of polish over each other and wait for each coat to dry. Not only is it time consuming, the thick layer of polish makes it even more difficult to take off.

Kelli’s tips to create a beautifully dense sparkly finish with just one coat of glitter polish involves a little preparation.

Start with a clean nail and apply a base coat. Then put a little liquid latex around your nail so that any polish that gets on your fingers can be peeled off afterwards.

The final step is her secret weapon. She uses a regular cheap cosmetic sponge to apply the polish!

Simply paint some glitter polish onto the edge of the sponge and then dab the sponge directly onto your nail.  The sponge soaks up the clear nail polish, leaving just the flecks of glitter which stick to your nails!

5 Ways to Remove Glitter Nail Polish

It’s now time to remove all of that glitter nail polish that you meticulously applied.  These are the most common ways to take it all off.

1. Nail Polish Remover and Cotton Balls

This is an easy method and you probably will have nail polish remover and cotton balls in your bathroom cupboard.  

  • Soak a small cotton ball in nail polish remover. Either acetone or non-acetone based remover will work, though acetone will probably remove glitter nail polish more effectively than non.
  • Place the cotton ball directly on the nail polish and push down so that the polish is completely covered.
  • Leave the cotton balls on your nails for at least five minutes. You can use a tiny elastic band to keep it in place, wrap foil around each finger nail, or just stay still.
  • Remove the cotton ball, using some pressure to wipe off the softened polish.
  • If there is still a bit of polish left on your nails, then go over them again with a soaked cotton ball.

ProsIt works really well to efficiently remove glitter nail polish.

Cons: Acetone is an extremely powerful solvent so it can be very harsh on your nails. It’s best to limit your use of it. This method uses a lot of nail polish remover and cotton balls and is not a quick fix.

2. Soak Your Fingertips in Nail Polish Remover

You definitely have to make sure you use non-acetone remover for this method. Only do it if you couldn’t budge the glitter nail polish using remover-soaked cotton balls.

  • Fill a small bowl with about two inches of nail polish remover. You want to use a bowl that is big enough to fit in all of your five fingers at once.
  • Leave your fingertips in the remover for a couple of minutes.
  • Remove your fingers and use a cotton ball or textured makeup cotton square to rub off the remaining polish.
  • If you still can’t get all the polish off, repeat the process leaving your fingers in the remover for only 30 seconds.
  • Repeat this process with your other hand.

Pros: This will get rid of the final traces of glitter nail polish.

Cons: It’s time consuming and you need to use a lot of nail polish remover.

3. Apply New Nail Polish on Top of Your Old

You can remove glitter nail polish by applying a layer of new nail polish on top of your current polish and then wiping them both off with a nail-polish-soaked cotton ball.

  • Use any nail polish you want. In fact it’s a great way of using up colors you don’t like.
  • Do one nail at a time because you don’t want the polish to dry.
  • Once you’ve painted your nail, take a cotton ball soaked in nail polish remover and swipe it over your nail. Both the new wet coat and the existing coat of glitter nail polish should wipe right off.

Pros: This is a really quick way of getting your glitter nail polish off.

Cons: You still need to use nail polish remover and cotton balls. You are wasting nail polish so only do this method if you have some you don’t use or like anymore.

4. Use a Liquid Latex Base Coat

This method makes it super simple to remove your glitter nail polish. However, you need to do this before you apply your nail polish colour.

  • Paint a coat of liquid latex onto your nail.
  • Let  it dry completely.
  • Paint your nail as normal.
  • To remove the nail polish, lift up the liquid latex and the polish should peel off in one piece without leaving any residue on your nails.

Pros: Quick and effective, you don’t need nail polish remover or cotton balls.

Cons: It is an extra step in the process of painting your nails. In addition, the liquid latex is quite easy to peel so the polish may not last very long. There is a chance you could accidentally remove the polish.

5. Individually Packed Nail Polish Remover Wipes

This is far and away the easiest, cleanest and quickest way to remove glitter nail polish.  

You will only need one nail polish remover wipe to take the most stubborn nail polish off all ten fingers.  The best  wipes are those enriched with vitamins and oils that will care for your nails, strengthen them and help them to grow.

Pros: Wipes don’t make any mess. The removal process is quick and effective. Best of all, they are super convenient and inexpensive.

Cons: It’s hard to think of any! You may need to use more than one wipe to get the last traces of glitter nail polish off if you’ve applied multiple layers of it.

Do you wear glitter nail polish? Have you had trouble removing it or do you have a sure-fire way of getting every little speck of glitter off?

Red Wine Stained Teeth? Here’s What You Can Do

Have you ever been to the bathroom to check your makeup after a few glasses of wine, smiled into the mirror and realized in horror that your teeth have turned a peculiar shade of purple? Having red wine stained teeth can make you feel very self conscious. Not everyone will experience the same amount of staining. How porous…

Have you ever been to the bathroom to check your makeup after a few glasses of wine, smiled into the mirror and realized in horror that your teeth have turned a peculiar shade of purple? Having red wine stained teeth can make you feel very self conscious.

Not everyone will experience the same amount of staining. How porous your teeth are, or in other words, how strong the enamel on your teeth is, will determine how badly red wine will stain. That is because chemicals in the red wine, called tannins, get absorbed into the surface of this enamel.

How to Clean Red Wine Stained Teeth?

Of course you can stop drinking red wine altogether, but that’s no fun! Why not try these things to reduce the severity of the staining?

1. Brush Your Teeth

Having plaque-free teeth is the best way to avoid a red wine stained smile. Make an appointment with your dentist right away! Regular checkups and professional cleaning, along with proper dental care at home will keep your teeth clear of stains from any drinks or food.

If you have room in your purse, take a travel-sized toothbrush and toothpaste with you. You can give your teeth a quick brush before you head out to the bar or restaurant if you can’t get home first.

If you want to brush your teeth after drinking red wine, leave it for at least a few minutes. Brushing too soon after drinking red wine will strip away some of the enamel because the wine’s acid will still be in your mouth and on your teeth, .

2. Alternate with Sparkling Water

This is a great one, not only to help combat red wine stained teeth, but also to stay hydrated and slow down your alcohol consumption.

After each glass of red wine, drink a glass of sparkling water or seltzer. The effervescence (bubbles) in the water will help to lift the stain.

You can swish around the water in your mouth, but do this in the bathroom or you may get some very strange looks!

3. Use Teeth and Mouth Cleaning Wipes

Using teeth wipes is a really discreet and convenient way to remove stains from your teeth. If brushing your teeth in a public restroom is not possible or not something you want to do, then a quick once-over with a tooth wipe is ideal.

These wipes are made with textured material that gently removes wine, coffee and food stains from your teeth. Often flavored with fresh mint, you can even use them on your lips and tongue for a full mouth clean.

A few individually-packed mouth cleaning wipes can easily fit in your purse or pocket. Your friends will love you if you have a couple to share, too!

4. Eat Cheese

Cheese and wine is a match made in heaven. Luckily eating cheese can help reduce red wine stained teeth.

Cheese contains proteins that form a protective layer on the surface of your teeth making it harder for stains to penetrate.

Cheese is also high in calcium, which is an important mineral for strong bones and teeth. Harder cheeses like cheddar or parmesan tend to have a higher calcium content over soft cheeses like brie or camembert.

5. Choose a Light-Colored Red Wine

The rule of thumb is the darker the wine, the worse the staining. This is because of the higher levels of tannins in dark red wine.

There are some beautiful lighter red wine varieties such as Pinot Noir or Burgundy. These contain fewer tannins than heavier reds like Bordeaux or Cabernet Sauvignon.

Also try to avoid drinking any wine that is high in acidity. You may think that drinking white wine first and then going on to red will help, but it actually makes it worse. The high acidity in white wine will erode your tooth enamel and then the staining from the next glass of red will be much more pronounced.

What are your tried and tested tricks to keeping your pearly whites white?

How to Remove Eye Makeup – Five Products That Will Guarantee You Get it All Off In One Easy Swipe

Sleeping in your makeup is a beauty no-no. But what about when you’re too tired to care? Why not try one of these five products that make taking off your makeup an easy task?

Most experts would agree that the golden rule of skin care is that you should never, never, never go to bed without first removing all of your makeup.

You probably know that makeup can clog your pores and not allowing your skin to breathe will result in a dry, lackluster complexion. Sometimes even blemishes or acne.

But did you also know that sleeping in your makeup can result in unnecessary exposure to free radicals? Causes of oxidative stress, such as pollution in the environment, gets trapped in your makeup. Continuous exposure to free radicals causes collagen break down. Over time this can result in fine lines and prematurely aged skin.

Although forgetting to cleanse off foundation or oil-based primers is the worst for your skin, sleeping with eye makeup can also lead to problems. The tiny hair follicles and oil glands on your eyelids can become clogged by mascara or eyeliner. Bacteria then builds up and causes inflammation, resulting in the formation of small bumps called styes.

I hope that has made you reconsider sleeping in your makeup ever again! Knowing how to remove eye makeup quickly will make the process so much easier.

Here are five fantastic products to keep in your bathroom cabinet, or even in your bedside table drawer.

1. Microfiber Cloths Need Only Water to Work

There are lots of different types of microfiber makeup removal cloths on the market. Some are simply squares of microfiber, others are circular shaped.

Whatever form you choose, the science behind microfiber is the same.  Microfiber is about 100 times finer than human hair. Just by wetting the cloth with water, the fibers are able to get deep down into the skin’s pores. They then lift out any trapped makeup, dirt and oil that is on the skin.

2. Makeup Remover Wipes are Totally Mess Free

Makeup remover towelettes have got to be one of the easiest ways to take off your makeup. Stash a couple in your purse and definitely keep some in your nightstand so you can quickly remove your makeup if you forget to before going to bed.

Savvy Travelers Take Offz remove all traces of makeup, even waterproof mascara and liquid eyeliner!  They are super easy to use. Just take one out of its pack, gently wipe your face and eyes and throw the used wipe in the trash.Makeup remover wipes are also perfect for travel.  They are so convenient to use and fit easily into your carry-on or luggage.

3. In a Pinch, Use Petroleum Jelly

Your makeup will slide right off with petroleum jelly. It’s made from petrolatum, which is made from mineral oils and waxes. Use your finger to smear a little over your eyes and wipe off gently with a cotton pad.

Fun tip – if you want your eyelashes to grow thicker or to assist the regrowth of over-plucked brows, slick some petroleum jelly on the hairs overnight. Just be careful not to get any in your eyes.

4. Micellar Water is a Wash, Remover and Moisturizer in One

Micellar water is made up of tiny balls of cleansing-oil molecules (called micelles) suspended in soft water. The micelles are attracted to dirt and oil. They act like a magnet, drawing out makeup, dirt and oil, away from the skin.

Micellar water acts like a magnet to lift dirt, oil and makeup from your skin, without the need for any harsh rubbing.

To remove eye makeup simply soak a cotton pad with micellar water and hold over the eyes for a few seconds. Always wipe in a downwards motion.

5. Coconut Oil – the Handiest Product in Your Kitchen Cupboard

Organic, cold-pressed coconut oil is a brilliant all-rounder. Not only can you use it to cook, but it is also safe to use on your face. Because of its detergent effect, it works well as a makeup remover.

Coconut oil solidifies in the colder weather, so if it isn’t liquid, rub a little between your hands.  Very gently rub onto dry skin. Use a little more to remove any heavy eye makeup.

How to Remove Eye Makeup – A Professional Makeup Artist’s Tip

Professional makeup artist and New Yorker Jill McKay says that cotton is the best material to use with any eye makeup remover. However, her secret is to dampen the cotton with water first. This way the makeup will glide right off. According to McKay, if you just put makeup remover straight onto dry cotton it will end up pulling on the eye and dragging makeup on the skin around it.

Have you been guilty of sleeping in your makeup? Just click on the link below to get your own makeup remover wipes, so you never do it again!

How Do You Take off Waterproof Mascara? Experts Reveal Their Top Secret Techniques

One of the hardest makeup products to remove is waterproof mascara. Here experts share their top tips to quick and easy mascara removal.

Removing smudge proof, long wearing and waterproof makeup can be the bane of a makeup lover’s existence. Doing it incorrectly will result in panda eye and even more serious, damaged skin and lashes.

I thought I would find out what the experts suggest to answer one of the most-asked beauty questions. How do you take off waterproof mascara?

1. Cotton Pads Are Number One

New York City dermatologist Joshua Zeichner, MD suggests that you use 100 % cotton pads that do not shed and are lint free. You don’t want little fibers sticking to your lashes.

2. Avoid Using Cotton Balls

Angela Caglia, facialist to the stars, says cotton balls are a no-no for makeup removal. Those loose fibers can actually get into your eyes and cause irritation and infection.

However, cotton balls can be used to apply toners all over the face.

3. Use a Makeup Wipe

Makeup artist Matthew Waitesmith loves using makeup remover towelettes. They are simple, practical and gentle and an item he always carries in his makeup kit.

Savvy Travelers’ Take Offz  facial cleansing wipes are suitable for all skin types and will remove even the most stubborn waterproof mascara in one gentle wipe.

4. Only Use Makeup Remover Made Specifically for the Eyes

To avoid possible irritation to the eyes, Zeichner advises to only use a remover that has been specifically formulated to dissolve makeup. Never use regular soap as they contain ingredients such as harsh chemical cleansers that should not go anywhere near the eye.

5. Place a Warm, Wet Washcloth on Your Eyes

Makeup artist Georgina Graham swears by pressing a warm or hot washcloth to lashes for around a minute. This will remove clumpy mascara by loosening up the mascara from your lashes.

6. Never Use Alcohol-based or Artificially Fragranced Products

Another dermatologist warns against using products that contain alcohol or fragrances to remove waterproof cosmetics. This is because these ingredients can dry out and strip the natural oils from the delicate skin on and around the eyes. This can lead to irritation and premature lines and wrinkles.

7. Always Be Gentle

The skin on the eyelids is extremely sensitive. In fact, the skin there is the thinnest of all parts of the body. This is why dermatologist Kristina Goldenberg, MD advises using a very gentle touch when cleansing eye makeup.

In addition, too much pressure on your eyes can even break the blood vessels says New Jersey-based dermatologist Jeanine Downie, MD.

8. Take Your Time

Never rush the makeup removal process recommends dermatologist Dendy Engelman, MD.

Hurriedly scrubbing at your eyes will only result in pulling the skin and damaging it.  Allow time for the mascara to dissolve, either by pressing a makeup wipe, wet washcloth or cleanser-soaked cotton pad over the eye.

9. Apply a Coat of Regular Mascara First

Professional makeup artist Nick Barose always starts with a layer of regular mascara as a base coat. Then he adds a second coat using the waterproof formula. With this method, the lashes are still sealed in a waterproof barrier, but using the regular mascara underneath makes it much easier to remove.

10. Don’t Forget Your Lash-line and Corners

The edge of your eyelid and corners of the eye are often neglected when it comes to makeup removal. These areas tend to be where eyeliner and mascara build up and if you don’t clean them out properly it can cause irritation.

Makeup artist Min Min Ma uses Q-tip to give those hard-to-reach areas a gentle clean. You can soak the tip in makeup remover or even some coconut oil.

How Do You Take Off Waterproof Mascara?

I’d love to know your secrets in the comments below!